Cleaning Your Kitchen: A Step-By-Step Guide
Turn on your happy playlist, open up the windows and bring out those rubber gloves… It’s time to deep clean the kitchen! Now, you probably already have a system down for those daily kitchen clean-ups and wipe-downs, but today we are going much further than that. It can certainly be a daunting task to clean the kitchen and sometimes you just don’t know where to start or where to stop. Here is our step-by-step process for those majorly important, somewhat intimidating, and extremely satisfying deep cleaning days.
Before we get into the cleaning steps, make sure to first have all of your supplies and equipment nearby and handy. There is nothing more frustrating than being elbow deep in cleaning just to realize you don’t have that one cleaner you really need. Remember, the better prepared you are to start, the smoother the overall process will be. Okay… now on to the steps…
1. Clear the Counters!
Get rid of all of the clutter and give yourself a clean slate. Put the kitchen items back in their proper places and gather up all of the items that do NOT belong in the kitchen. You can return those items back to their homes immediately, or you can put all of the misplaced stuff into a basket and deal with them once you’ve got that squeaky-clean kitchen finished.
2. Ceilings to Baseboards
Grab the extender duster and start high. You want to make sure to do this step towards the beginning of the cleaning process in order to avoid getting dirt or dust onto places where you’ve already cleaned. Use a long-handled duster and work your way around the entire perimeter of the room. Clean the light fixtures, the tops of the cabinets, and the top of the refrigerator.
3. On To the Oven
Oven cleaning certainly doesn’t need to be done as often as some other kitchen cleaning tasks but it surely shouldn’t be completely forgotten about or avoided. Oftentimes, it’s the thought of cleaning the oven that’s worse than the cleaning itself. Having a clean oven will reduce that lingering smell, eliminate smoke, and increase the overall appearance of the kitchen.
To begin, make sure to remove any large debris at the bottom of the oven and take out all of the racks. Then apply the cleaner of your choice to the entirety of the oven – avoiding the heating elements – and get into all of those little crevices. Let that cleaner work its magic!
4. Work with the Fridge
Now is the time to throw away any old food, condense the containers, and reorganize. Take everything out of the fridge and scrub down all of the racks and drawers with dish soap and water. Before returning items back to the fridge, make sure to dry all surfaces and adjust rack heights if needed. Finding your preferred method to organize the items within your fridge will help with the longevity of cleanliness and order. Don’t forget to wipe down the front of the fridge as well – including the handles and water dispensing area.
5. Knock Out the Appliances
First – The Microwave. Grab a microwave-safe dish, add water and a splash of vinegar, and bring to a boil inside the microwave for a few minutes until the windows steam up. Let cool for 2-3 minutes before opening the door, then remove the bowl and wipe the inside clean. Next, remove the microwave turntable and clean it in the sink. Don’t forget to wipe down the outside of the microwave as well with the cleaner of your choice – we recommend an all-purpose, grease-cutting cleaner or a sudsy mix of dish soap and water.
Next – The Stove Top. Depending on the type of stovetop your kitchen has will determine how you should go about cleaning it. Some require different methods of cleaning so we recommend doing a little research to find the best tips and tricks for your configuration. Make sure not to forget about the knobs, the spaces on the sides between the stovetop and the counter, and even the vent above. If your stove stop contain grates and burner caps, be sure to remove them and scrub them clean inside the sink.
Finally – The Dishwasher. If your dishwasher isn’t clean, your dishes won’t be either. Start by emptying any dishes from the dishwasher and placing a cup of white vinegar on the top rack. Run a normal, hot cycle without any detergent or dishes. If you want to take it one step further, sprinkle a handful of baking soda into the bottom of your dishwasher and run another hot wash cycle in order to remove any remaining food particles. Also, don’t forget to check the filter or food trap at the bottom of the dishwasher and clean it thoroughly as well.
6. Clean the Countertop
The best practices for cleaning countertops can vary depending on the type of topped finish. Knowing your countertop is vital in order to ensure you are purchasing the best cleaner. Although, a safe bet for pretty much all countertops is a homemade mix of warm water and a dash of dish soap. Use either a soft cloth or a clean sponge and work in circular motions with light to medium pressure. Be sure to remove all soap and wipe dry. If your countertop requires polishing, you should finish with that.
7. Don’t Forget the Details!
You’re doing great and you are almost to the finish line! Here is when you make sure to focus on any details in your kitchen that weren’t touched previously. Whether that be perfecting the stainless steel finishes, wiping down cabinet faces, or cleaning the windows.
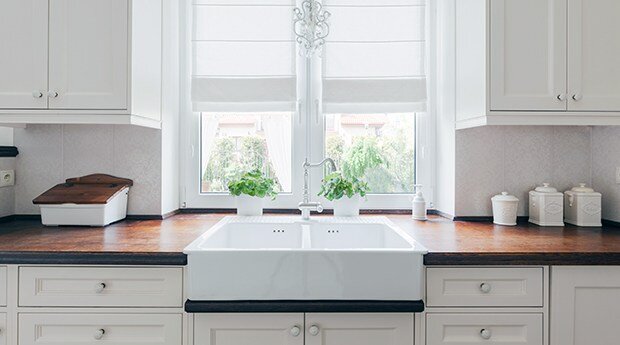
8. Now to the Sink
Here is the time where you should wash those old containers you took from the fridge and clean up additional dishes that may be hanging out in the sink. Make sure to wipe down the faucet and soap dispensers as well as restock any sponges or dishcloths.
Lastly, rinse out any remaining cleaner from the sink with hot water and dry it out with a rag. In order to keep the sink smelling fresh, here’s a little tip – toss some lemon peel and baking soda into the garbage disposal and run it with some hot water! So Fresh and So Clean!
9. Finish with Floors
Finally! You’ve made it to the floor! Sweep, vacuum, and mop those floors. Be sure to use a vacuum attachment to get into the corners and along the baseboards. When mopping, work from one end of the kitchen to the other in order to avoid stepping on the portions of the floor that are wet.
Take a step back and admire your results!
Need some help taking care of your home? Contact G. B Cleaning Service by filling out the form here or contact us at 267-481-4284 to learn more about our services today!